When you knit in 1×1 ribbing, do you find that you wind up being left with an excessive number of stitches? Having to reduce the number of stitches you are working on in order to get back on track can be very irritating. We have a step-by-step instruction that will assist you with decreasing the number of stitches in your 1×1 ribbing, so there is no need to be concerned about this.
Cuffs, collars, and borders are all examples of items that frequently make use of the 1×1 ribbing stitch pattern, which is a typical stitch pattern. This process results in the creation of a fabric that is both flexible and textured, making it ideal for giving your outfits a professional appearance.
Nevertheless, if you find that you have an excessive number of stitches in your ribbing, it has the potential to disrupt the symmetry of the pattern and have an impact on the overall appearance of your item.
In this lesson, we will take you through the process of reducing stitches in 1×1 ribbing in a step-by-step manner. In this lesson, we will discuss the many approaches to decreasing, as well as offer advice and suggestions to ensure a smooth and unbroken reduction.
By following our instructions, you will be able to confidently tackle any ribbing project and obtain the precise stitch count each and every time. In order to begin reducing stitches in 1×1 ribbing, please take your needles and join me in this endeavor!
Contents
- 1 What is 1×1 Ribbing and Why Decrease Stitches in It?
- 2 Tools Needed for Decreasing Stitches in 1×1 Ribbing
- 3 Steps to Decrease Stitches in 1×1 Ribbing
- 4 Troubleshooting Common Decreasing Issues in 1×1 Ribbing
- 5 Tips for Maintaining a Neat Edge in 1×1 Ribbing
- 6 Conclusion
- 7 FAQs
- 8 Q: What is 1×1 ribbing?
- 9 Q: How do I decrease stitches in 1×1 ribbing?
- 10 Q: Can I decrease stitches in 1×1 ribbing without a cable needle?
- 11 Q: What is a ribbed double decrease?
- 12 Q: Can I find a tutorial on decreasing stitches in 1×1 ribbing on YouTube?
- 13 Q: How do I cast on and bind off in 1×1 ribbing?
- 14 Q: Why is decreasing stitches in 1×1 ribbing important?
What is 1×1 Ribbing and Why Decrease Stitches in It?
Explanation of 1×1 Ribbing
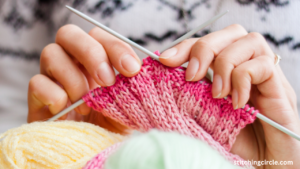
1×1 ribbing is a stitch pattern that involves alternating knit and purl stitches in each row, creating a fabric that is elastic and suitable for various projects like scarves, hats, and cuffs. The repetitive nature of 1×1 ribbing gives it a distinct texture and stretchiness.
Importance of Decreasing Stitches in 1×1 Ribbing
Decreasing stitches in 1×1 ribbing is essential when shaping your project, such as creating tapered sleeves or shaping the crown of a hat. It is crucial to decrease stitches evenly to maintain the integrity of the ribbing pattern and achieve the desired fit.
Common Issues Encountered in Ribbing
Common issues in ribbing include tight stitches, uneven tension, and misaligned columns. By mastering the techniques for decreasing stitches in 1×1 ribbing, you can address these challenges and create a polished finished product.
Tools Needed for Decreasing Stitches in 1×1 Ribbing
Knitting Needle Sizes
When decreasing stitches in 1×1 ribbing, ensure you have the appropriate knitting needle sizes that match your yarn weight. Using the correct needle size will help maintain consistent tension and achieve the desired gauge.
Yarn Selection for Ribbing
Choose a yarn that complements your ribbing pattern and is suitable for the project at hand. Yarns with good elasticity and structure work well for 1×1 ribbing, providing a snug fit and definition to the stitches.
Other Essential Supplies
Aside from needles and yarn, other essential supplies for decreasing stitches in 1×1 ribbing include stitch markers, scissors, and a tape measure. Having these tools handy will streamline the decreasing process and ensure accuracy.
Steps to Decrease Stitches in 1×1 Ribbing
Identifying the Stitches to Decrease
Before starting the decreasing process, identify the stitches that need to be decreased in the 1×1 ribbing pattern. Pay attention to the knit and purl columns to determine where the decreases should be made.
Techniques for Decreasing Stitches
There are several techniques for decreasing stitches in 1×1 ribbing, including knit two stitches together or using a slip, slip, knit (ssk) decrease method. Experiment with different techniques to find the one that works best for your project.
Ensuring Consistent Tension Throughout
Maintaining consistent tension while decreasing stitches is crucial to preserve the uniformity of the ribbing pattern. Pay attention to your knitting tension and adjust as needed to achieve a neat and seamless finish.
Troubleshooting Common Decreasing Issues in 1×1 Ribbing
Dealing with Tight Stitches
If you encounter tight stitches when decreasing in 1×1 ribbing, try using a larger needle size or loosening your tension slightly. This adjustment can help prevent puckering and make the decreases blend seamlessly into the fabric.
Correcting Mistakes in Decreasing
If you make a mistake while decreasing stitches, don’t fret. Tink back to the error or use a crochet hook to fix misplaced decreases. Taking the time to correct mistakes ensures a professional-looking finish.
Adjusting for Different Ribbing Patterns
When working with other ribbing patterns like 2×2 ribbing, adjust your decreasing techniques accordingly to maintain the overall symmetry of your project. Understanding how different ribbing patterns behave will help you achieve consistent results.
Tips for Maintaining a Neat Edge in 1×1 Ribbing
Slipping Stitches for a Cleaner Edge
Slipping the first or last stitch of each row can create a cleaner edge in 1×1 ribbing, enhancing the overall look of your project. This simple technique adds polish to your ribbing and elevates the final result.
Using Markers for Decrease Points
Place stitch markers at key decrease points in your ribbing pattern to visually guide your decreases and ensure they are evenly distributed. Markers help maintain the rhythm of the pattern and prevent mistakes.
Blocking to Enhance the Ribbing
After completing the decreasing process, consider blocking your project to refine the ribbing stitches and enhance their definition. Blocking evens out stitches and gives your work a professional finish.
Conclusion
In conclusion, this tutorial offers a clear and complete guidance for decreasing stitches in 1×1 ribbing. It is presented in a step-by-step format. Knitters can successfully traverse the process of lowering stitches while preserving the ribbed pattern if they follow these directions and follow them to the letter.
Mastering the method of decreasing stitches is vital for attaining a professional and polished finish, whether of whether you are working on a sweater, hat, or any other project that involves 1×1 ribbing.
It is possible for knitters to properly reduce stitches without affecting the integrity of the ribbed fabric if they practice and have patience.
Therefore, the next time you find yourself in a situation where you need to reduce stitches in 1×1 ribbing, you should think about returning to this guide for some direction and ideas. Enjoy your knitting!
FAQs
Q: What is 1×1 ribbing?
A: 1×1 ribbing is a knitting pattern created by alternating knit and purl stitches every round, resulting in a stretchy and textured fabric.
Q: How do I decrease stitches in 1×1 ribbing?
A: To decrease stitches in 1×1 ribbing, you can use techniques like the ribbed double decrease or the slip slip knit (ssk) decrease to maintain the integrity of the ribbing pattern.
Q: Can I decrease stitches in 1×1 ribbing without a cable needle?
A: Yes, you can decrease stitches in 1×1 ribbing without a cable needle by using techniques like the slip slip knit (ssk) decrease or the knit two together (k2tog) decrease.
Q: What is a ribbed double decrease?
A: A ribbed double decrease is a knit stitch decrease that elegantly maintains your ribbing pattern while decreasing two stitches at once. It is completely reversible and looks nice on both sides of your work.
Q: Can I find a tutorial on decreasing stitches in 1×1 ribbing on YouTube?
A: Yes, you can find tutorials on decreasing stitches in 1×1 ribbing on YouTube by searching for keywords like “1×1 ribbing decrease tutorial” or “ribbed double decrease tutorial”.
Q: How do I cast on and bind off in 1×1 ribbing?
A: To cast on and bind off in 1×1 ribbing, simply follow the same ribbing pattern (knit 1, purl 1) for the first and last few rounds of your project to maintain a consistent edge.
Q: Why is decreasing stitches in 1×1 ribbing important?
A: Decreasing stitches in 1×1 ribbing is important to shape your project and create various garment designs. It allows you to taper your work smoothly while maintaining the ribbed texture.
